How to Make Homemade Ginger Kombucha: A Step-by-Step Guide

How to Make Homemade Ginger Kombucha: A Step-by-Step Guide
Kombucha, a fermented tea beverage, has been gaining popularity for its potential health benefits and unique flavor. The addition of ginger to the traditional kombucha recipe not only adds a pleasant zing to the drink but also introduces the numerous health benefits associated with ginger. Making homemade ginger kombucha is a fun and rewarding process that allows you to customize the flavor to your liking while reaping the benefits of its probiotic content.
In this step-by-step guide, we will walk you through the process of making your own ginger kombucha at home. Whether you’re a seasoned kombucha brewer or a complete beginner, this guide will equip you with the knowledge and confidence to create a delicious and refreshing batch of ginger kombucha.
Step 1: Gather Your Supplies
Before you begin brewing your ginger kombucha, it’s essential to gather all the necessary supplies. Here’s what you’ll need:
– One gallon glass jar
– 7-8 tea bags (black, green, or a combination of both)
– 1 cup of granulated sugar
– 2 cups of starter tea (unflavored kombucha from a previous batch or store-bought)
– SCOBY (symbiotic culture of bacteria and yeast)
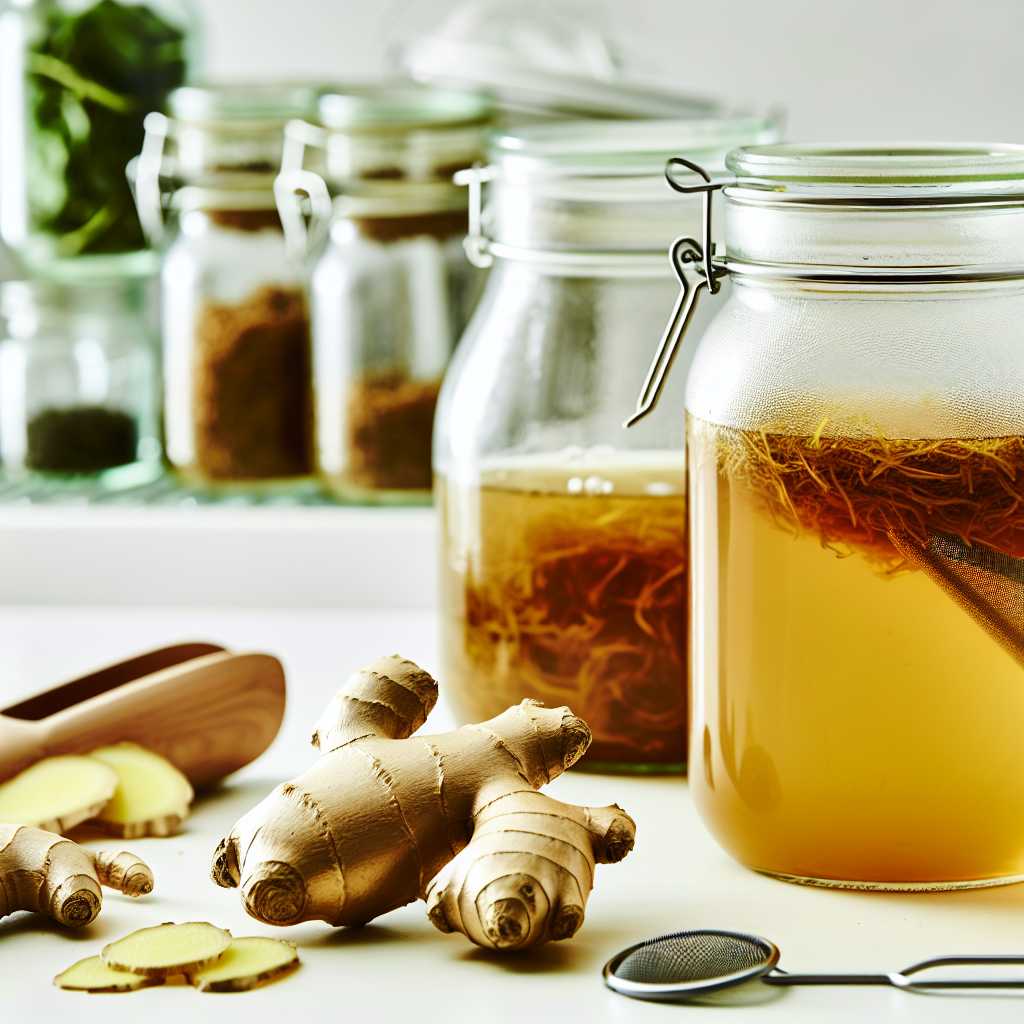
– 1-2 large pieces of fresh ginger
– Cheesecloth or coffee filter
– Rubber band
– Plastic or wooden stirring utensil
– pH strips or a pH meter
– Bottles for bottling the finished kombucha
Step 2: Prepare the Sweet Tea Base
To start the brewing process, begin by boiling 4 cups of water. Once the water reaches a rolling boil, remove it from the heat and add the tea bags. Let the tea steep for about 10-15 minutes, then remove the tea bags. Stir in the granulated sugar until it dissolves completely. This sweet tea base will serve as the nourishment for the SCOBY and kick-start the fermentation process.
Allow the sweet tea to cool to room temperature. It’s essential to let it cool completely to avoid damaging the SCOBY with hot liquid. This step may take some time, so be patient and ensure the tea is adequately cooled before proceeding to the next step.
Step 3: Add the Starter Tea and SCOBY
Once the sweet tea base has cooled, transfer it to the gallon glass jar. Add the starter tea from a previous batch of unflavored kombucha or store-bought kombucha. The starter tea introduces the beneficial bacteria and yeast required for the fermentation process. Next, carefully place the SCOBY on top of the sweet tea. The SCOBY acts as the catalyst for fermentation and transforms the sweet tea into tangy and effervescent kombucha.
Step 4: Add the Ginger
Now it’s time to prepare the ginger for your kombucha. Using a grater or peeler, remove the outer layer of the ginger root. Then, slice or grate the ginger into small pieces. The amount of ginger you use will depend on your preference for the intensity of the ginger flavor in your kombucha. As a general guideline, using 1-2 large pieces of ginger for a one-gallon batch should impart a noticeable but not overpowering ginger taste.
Add the grated or sliced ginger to the gallon jar with the sweet tea, starter tea, and SCOBY. The ginger will infuse the kombucha with its distinctive flavor and bring its health-promoting properties to the brew.
Step 5: Cover and Ferment
After adding the ginger, cover the mouth of the gallon jar with a double layer of cheesecloth or a coffee filter and secure it with a rubber band. This covering allows the kombucha to breathe while keeping out dust, debris, and pests. Place the jar in a warm, dark place and let it ferment for 7-14 days, depending on your flavor preferences. The longer the fermentation period, the more tangy and carbonated the kombucha will become.
During the fermentation process, you may notice the formation of a new SCOBY on the surface of the kombucha. This is a natural occurrence and indicates that the fermentation is progressing as it should. The newly formed SCOBY can be used to start a new batch of kombucha or shared with other homebrewers.
Step 6: Check the pH Level and Taste
At the 7-day mark, it’s a good idea to start testing the kombucha for its pH level and taste. Using pH strips or a pH meter, check the acidity of the kombucha. The ideal pH for finished kombucha is around 2.5-3.0. Additionally, use a straw to carefully taste the kombucha. If the flavor isn’t quite developed to your liking, allow the kombucha to ferment for a few more days before testing it again.
Step 7: Bottle the Kombucha
Once the kombucha reaches your desired flavor profile, it’s time to bottle it. Carefully remove the SCOBY from the gallon jar and set it aside in a clean bowl. Measure out 2 cups of the finished kombucha to use as starter tea for your next batch. This will ensure the continuity of your kombucha brewing process.
Using a funnel, pour the remaining kombucha into glass bottles, leaving about an inch of headspace at the top of each bottle. If you like, you can add a small piece of fresh ginger or a few slices of ginger to each bottle for an extra kick of flavor. Seal the bottles tightly with airtight caps and set them aside at room temperature for 2-3 days to allow carbonation to build. After this secondary fermentation period, refrigerate the bottles to slow down the carbonation process.
Step 8: Enjoy Your Homemade Ginger Kombucha
Congratulations, you’ve successfully brewed your own ginger kombucha! Once the bottled kombucha has had a chance to chill in the refrigerator, it’s ready to be enjoyed. Pour a glass, savor the tangy flavor, and relish in the knowledge that you’ve created a delicious and healthful beverage right in your own kitchen.
Homemade ginger kombucha is a versatile drink that can be enjoyed on its own, flavored with fruit juice, or mixed into creative cocktails and mocktails. With each sip, you’ll be treating your body to a dose of gut-friendly probiotics, digestive enzymes, and the anti-inflammatory properties of ginger. Plus, you’ll have the satisfaction of knowing that you made it yourself, tailored to your taste preferences.
Final Thoughts
Brewing homemade ginger kombucha is a delightful and rewarding endeavor that allows you to experiment with flavors, reap the health benefits of fermentation, and reduce your reliance on store-bought beverages. By following this step-by-step guide, you’ll have the knowledge and confidence to embark on your own ginger kombucha brewing journey.
Remember that making kombucha at home requires patience, attention to detail, and a sense of adventure. Don’t be discouraged if your first batch isn’t perfect – fermentation is a living process, and there’s always something new to learn with each brew. Embrace the journey, enjoy the fruits of your labor, and raise a glass to the ancient tradition of kombucha brewing in your own modern kitchen. Cheers to your homemade ginger kombucha!
[elementor-template id=”430″]
[elementor-template id=”433″]


0 Comments